Hi everyone,
Lets try to host Wordpress on our Ubuntu 16.04 using LAMP stack. For these steps, I have referred the following website. Since I have found few issues while trying to establish my wordpress server so tried to recreate one single and ready-to-follow post for your reference based upon my experience. This is tried and tested process which you can follow directly. Here I am using latest Ubuntu 16.04 with all packages updated as on dated 9/05/18.
Source:
https://www.digitalocean.com/community/tutorials/how-to-install-wordpress-with-lamp-on-ubuntu-16-04 Step 1: Install Apache and Allow in FirewallTo remove apache2
server@ubuntu:/home/abhi$ sudo apt-get purge apache2
server@ubuntu:/home/abhi$ sudo apt-get update
To reinstall
server@ubuntu:/home/abhi$ sudo apt-get install apache2
Set Global ServerName to Suppress Syntax Warnings
Add a single line to the /etc/apache2/apache2.conf file at the end to suppress a warning message: “ServerName 192.168.43.43”
While harmless, if you do not set ServerName globally, you will receive the following warning when checking your Apache configuration for syntax errors:
server@ubuntu:/home/abhi$ sudo apache2ctl configtest
Output
AH00558: apache2: Could not reliably determine the server's fully
qualified domain name, using 127.0.1.1. Set the 'ServerName' directive globally to suppress this message
Syntax OK
At the bottom of the file, add a ServerName directive, pointing to your primary domain name or IP address.
Next, check for syntax errors by typing:
server@ubuntu:/home/abhi$ sudo apache2ctl configtest
[sudo] password for server:
Syntax OK
Since we added the global ServerName directive, all you should see is:
Syntax OK
Restart Apache to implement your changes:
server@ubuntu:/home/abhi$ sudo service apache2 restart
Adjust
the Firewall to Allow Web TrafficNext,
assuming that you have followed the initial server setup instructions
to enable the UFW firewall, make sure that your firewall allows HTTP
and HTTPS traffic
server@ubuntu:/home/abhi$
sudo ufw app listAvailable
applications:
Apache
Apache
Full
Apache
Secure
CUPS
If
you look at the Apache
Full profile,
it should show that it enables traffic to ports 80 and 443:
server@ubuntu:/home/abhi$ sudo ufw app info "Apache Full"
Profile: Apache Full
Title: Web Server (HTTP,HTTPS)
Description: Apache v2 is the next generation of the omnipresent Apache web server.
Ports:
80,443/tcp
Allow
incoming traffic for this profile:
server@ubuntu:/home/abhi$ sudo ufw allow in "Apache Full"
You
can do a spot check right away to verify that everything went as
planned by visiting your server's public IP address in your web
browser
You
will see the default Ubuntu 16.04 Apache web page, which is there for
informational and testing purposes. It should look something like
this:

If
you see this page, then your web server is now correctly installed
and accessible through your firewall.
Step
2: Install MySQLNow
that we have our web server up and running, it is time to install
MySQL. MySQL is a database management system. Basically, it will
organize and provide access to databases where our site can store
information.
server@ubuntu:/home/abhi$
sudo
apt-get install mysql-serverDuring
the installation, your server will ask you to select and confirm a
password for the MySQL "root" user. This is an
administrative account in MySQL that has increased privileges. Think
of it as being similar to the root account for the server itself (the
one you are configuring now is a MySQL-specific account, however).
Make sure this is a strong, unique password, and do not leave it
blank.
When
the installation is complete, we want to run a simple security script
that will remove some dangerous defaults and lock down access to our
database system a little bit. Start the interactive script by
running:
server@ubuntu:/home/abhi$ mysql_secure_installation
You
will be asked to enter the password you set for the MySQL root
account. Next, you will be asked if you want to configure
the VALIDATE
PASSWORD PLUGIN.
Answer y for
yes, or anything else to continue without enabling.
If
you enabled password validation, you'll be shown a password strength
for the existing root password, and asked you if you want to change
that password. If you are happy with your current password,
enter n for
"no" at the prompt:
For
the rest of the questions, you should press Y and
hit the Enter key
at each prompt. This will remove some anonymous users and the test
database, disable remote root logins, and load these new rules so
that MySQL immediately respects the changes we have made.
At
this point, your database system is now set up and we can move on.
Step
3: Install PHPPHP
is the component of our setup that will process code to display
dynamic content. It can run scripts, connect to our MySQL databases
to get information, and hand the processed content over to our web
server to display.
We're
going to include some helper packages as well, so that PHP code can
run under the Apache server and talk to our MySQL database:
server@ubuntu:/home/abhi$
sudo
apt-get install php libapache2-mod-php php-mcrypt php-mysqlIn most
cases, we'll want to modify the way that Apache serves files when a
directory is requested. Currently, if a user requests a directory
from the server, Apache will first look for a file called index.html.
We want to tell our web server to prefer PHP files, so we'll make
Apache look for an index.ph file
first.
To
do this, type this command to open the dir.conf file
in a text editor with root privileges:
server@ubuntu:/home/abhi$ sudo nano /etc/apache2/mods-enabled/dir.conf
<IfModule mod_dir.c>
DirectoryIndex index.html index.cgi index.pl index.php index.xhtml index.htm
</IfModule>
#
vim: syntax=apache ts=4 sw=4 sts=4 sr noet
We
want to move the PHP index file highlighted above to the first
position after the Directory Index specification,
like this:
<IfModule
mod_dir.c>
DirectoryIndex
index.php index.html index.cgi index.pl index.xhtml inde$
</IfModule>
#
vim: syntax=apache ts=4 sw=4 sts=4 sr noet
When
you are finished, save and close the file
After
this, we need to restart the Apache web server in order for our
changes to be recognized. You can do this by typing this:
server@ubuntu:/home/abhi$ sudo service apache2 restart
server@ubuntu:/home/abhi$ sudo service apache2 status
● apache2.service - LSB: Apache2 web server
   Loaded: loaded (/etc/init.d/apache2; bad; vendor preset: enabled)
  Drop-In: /lib/systemd/system/apache2.service.d
           └─apache2-systemd.conf
   Active: active (running) since Thu 2018-05-10 13:54:48 IST; 1h 27min ago
     Docs: man:systemd-sysv-generator(8)
  Process: 1128 ExecStart=/etc/init.d/apache2 start (code=exited, status=0/SUCCESS)
   CGroup: /system.slice/apache2.service
           ├─1220 /usr/sbin/apache2 -k start
           ├─1224 /usr/sbin/apache2 -k start
           ├─1225 /usr/sbin/apache2 -k start
           ├─1226 /usr/sbin/apache2 -k start
           ├─1227 /usr/sbin/apache2 -k start
           └─1228 /usr/sbin/apache2 -k start

May 10 13:54:46 ubuntu systemd[1]: Starting LSB: Apache2 web server...
May 10 13:54:46 ubuntu apache2[1128]:  * Starting Apache httpd web server apache2
May 10 13:54:48 ubuntu apache2[1128]:  *
May 10 13:54:48 ubuntu systemd[1]: Started LSB: Apache2 web server.
If
we decided that php-cli is
something that we need, we could type:
server@ubuntu:/home/abhi$ sudo apt-get install php-cli
Step
4: Test PHP Processing on your Web Server
In
order to test that our system is configured properly for PHP, we can
create a very basic PHP script.
We
will call this script info.php.
In order for Apache to find the file and serve it correctly, it must
be saved to a very specific directory, which is called the "web
root".
In
Ubuntu 16.04, this directory is located at /var/www/html/.
We can create the file at that location by typing:
server@ubuntu:/home/abhi$ sudo nano /var/www/html/info.php
This
will open a blank file. We want to put the following text, which is
valid PHP code, inside the file:
<?php
phpinfo();
?>
When
you are finished, save and close the file.
Now
we can test whether our web server can correctly display content
generated by a PHP script. To try this out, we just have to visit
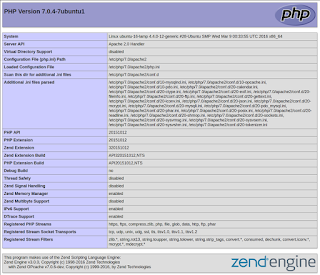
this page in our web browser.
The
address you want to visit will be:
http://192.168.43.43/info.php (Use your own IP address)

This
page basically gives you information about your server from the
perspective of PHP. It is useful for debugging and to ensure that
your settings are being applied correctly.
If
this was successful, then your PHP is working as expected.
Step
5:
Create a MySQL Database and User for WordPressWordPress
uses MySQL to manage and store site and user information. We have
MySQL installed already, but we need to make a database and a user
for WordPress to use.
To
get started, log into the MySQL root (administrative) account by
issuing this command:
server@ubuntu:/home/abhi$ mysql -u root -p
You
will be prompted for the password you set for the MySQL root account
when you installed the software.
First,
we can create a separate database that WordPress can control. You can
call this whatever you would like, but we will be using
“wordpressdatabase”
in
this guide to keep it simple. You can create the database for
WordPress by typing:
mysql > CREATE DATABASE wordpressdatabase DEFAULT CHARACTER SET utf8 COLLATE utf8_unicode_ci;
Next,
we are going to create a separate MySQL user account that we will use
exclusively to operate on our new database. Creating one-function
databases and accounts is a good idea from a management and security
standpoint. We will use the name wordpressuser in
this guide. Feel free to change this if you'd like.
We
are going to create this account, set a password, and grant access to
the database we created. We can do this by typing the following
command. Remember to choose a strong password here for your database
user:
mysql > GRANT ALL ON wordpressdatabase.* TO 'wordpressuser'@'localhost' IDENTIFIED BY 'password'; (Use strong password here)
You
now have a database and user account, each made specifically for
WordPress. We need to flush the privileges so that the current
instance of MySQL knows about the recent changes we've made:
mysql > FLUSH PRIVILEGES;
Exit
out of MySQL by typing:
mysql > EXIT;
Step
6:
Install Additional PHP ExtensionsWhen
setting up our LAMP stack, we only required a very minimal set of
extensions in order to get PHP to communicate with MySQL. WordPress
and many of its plugins leverage additional PHP extensions.
We
can download and install some of the most popular PHP extensions for
use with WordPress by typing:
server@ubuntu:/home/abhi$ sudo apt-get update
server@ubuntu:/home/abhi$ sudo apt-get install php-curl php-gd php-mbstring php-mcrypt php-xml php-xmlrpc
We
will restart Apache to leverage these new extensions in the next
section. If you are returning here to install additional plugins, you
can restart Apache now by typing:
server@ubuntu:/home/abhi$ sudo service apache2 restart
Step
7:
Adjust Apache's Configuration to Allow for .htaccess Overrides and
RewritesNext,
we will be making a few minor adjustments to our Apache
configuration. Currently, the use of .htaccess
files
is disabled. WordPress and many WordPress plugins use these files
extensively for in-directory tweaks to the web server's behavior.
Additionally,
we will enable mod_rewrite,
which will be needed in order to get WordPress permalinks to function
correctly.
Enable
.htaccess Overrides
Open
the primary Apache configuration file to make our first change:
server@ubuntu:/home/abhi$ sudo nano /etc/apache2/apache2.conf
To
allow .htaccess
files,
we need to set the AllowOverride
directive
within a Directory
block
pointing to our document root. Find
out the
<Directory
/var/www/html> and make following changes “AllowOverride All”
. . .
<Directory /var/www/html/>
AllowOverride All
</Directory>
. . .
When
you are finished, save and close the file.
Enable
the Rewrite Module
Next,
we can enable mod_rewrite
so
that we can utilize the WordPress permalink feature:
server@ubuntu:/home/abhi$ sudo a2enmod rewrite
Enable
the ChangesBefore
we implement the changes we've made, check to make sure we haven't
made any syntax errors:
server@ubuntu:/home/abhi$ sudo apache2ctl configtest
Restart
Apache to implement the changes:
server@ubuntu:/home/abhi$ sudo service apache2 restart
Step
8:
Download WordPressNow
that our server software is configured, we can download and set up
WordPress. For security reasons in particular, it is always
recommended to get the latest version of WordPress from their site.
Change
into a writable directory and then download the compressed release by
typing:
server@ubuntu:/home/abhi$ cd /tmp
server@ubuntu:/home/abhi$ wget https://wordpress.org/latest.tar.gz
Extract
the compressed file to create the WordPress directory structure:
server@ubuntu:/home/abhi$ tar -xzvf latest.tar.gz
We
will be moving these files into our document root momentarily. Before
we do, we can add a dummy .htaccess
file
and set its permissions so that this will be available for WordPress
to use later.
Create
the file and set the permissions by typing:
server@ubuntu:/home/abhi$ touch /tmp/wordpress/.htaccess
server@ubuntu:/home/abhi$ chmod 660 /tmp/wordpress/.htaccess
We'll
also copy over the sample configuration file to the filename that
WordPress actually reads:
server@ubuntu:/home/abhi$ cp /tmp/wordpress/wp-config-sample.php /tmp/wordpress/wp-config.php
We
can also create the upgrade
directory,
so that WordPress won't run into permissions issues when trying to do
this on its own following an update to its software:
server@ubuntu:/home/abhi$ mkdir /tmp/wordpress/wp-content/upgrade
Now, we can copy the entire contents of the directory into our
document root. We are using the -a flag to make sure our
permissions are maintained.
server@ubuntu:/home/abhi$ sudo cp -a /tmp/wordpress/. /var/www/html
Step
9:
Configure the WordPress DirectoryBefore
we do the web-based WordPress setup, we need to adjust some items in
our WordPress directory.
Adjusting
the Ownership and PermissionsOne
of the big things we need to accomplish is setting up reasonable file
permissions and ownership. We need to be able to write to these files
as a regular user, and we need the web server to also be able to
access and adjust certain files and directories in order to function
correctly.
We'll
start by assigning ownership over all of the files in our document
root to our username. We will use server as
our username in this guide, but you should change this to match
whatever your sudo user
is called. We will assign group ownership to the www-data group:
server@ubuntu:/home/abhi$ sudo chown -R server:www-data /var/www/html
Next,
we will set the setgid
bit
on each of the directories within the document root. This causes new
files created within these directories to inherit the group of the
parent directory (which we just set to www-data)
instead of the creating user's primary group. This just makes sure
that whenever we create a file in the directory on the command line,
the web server will still have group ownership over it.
We
can set the setgid
bit
on every directory in our WordPress installation by typing:
server@ubuntu:/home/abhi$ sudo find /var/www/html -type d -exec chmod g+s {} \;
There
are a few other fine-grained permissions we'll adjust. First, we'll
give group write access to the wp-content
directory
so that the web interface can make theme and plugin changes:
server@ubuntu:/home/abhi$ sudo chmod g+w /var/www/html/wp-content
As
part of this process, we will give the web server write access to all
of the content in these two directories:
server@ubuntu:/home/abhi$ sudo chmod -R g+w /var/www/html/wp-content/themes
server@ubuntu:/home/abhi$ sudo chmod -R g+w /var/www/html/wp-content/pluginsThis
should be a reasonable permissions set to start with.
Setting
up the WordPress Configuration File
Now,
we need to make some changes to the main WordPress configuration
file.
When
we open the file, our first order of business will be to adjust some
secret keys to provide some security for our installation. WordPress
provides a secure generator for these values so that you do not have
to try to come up with good values on your own. These are only used
internally, so it won't hurt usability to have complex, secure values
here.
To
grab secure values from the WordPress secret key generator, type:
server@ubuntu:/home/abhi$ wget https://api.wordpress.org/secret-key/1.1/salt/You
will get back unique values that look something like this:
define('AUTH_KEY', 'nE.--7T`#b6:||P!=x@.rD4.dBx+95OlPH=Co;PAovNp2rK$-0H[.G|y0KlewD/Y');
define('SECURE_AUTH_KEY', '+)[!da$)vYG.oC=m}q{A{z0~)_ -m]NyMT|!goYCoXDwA-Jvzk)Su@Cx-+i~X+.J');
define('LOGGED_IN_KEY', 'z//ZWYa@<9SYmMGvUPJ#-AACz2aD?ku2,F-jK<W+}|4BOT!Msg7(mN:%LQ9YUa-N');
define('NONCE_KEY', '>|r_Aiu5$W+5y#MD]EUc+]3$fbxw9^MaWSn7*#kxf6EJjIm#1#|A(D*$YAB+f4c');
define('AUTH_SALT', 'wn@FsGFY|:/8qFGkE,WOgaZ1|,.~4~-i@cW7zw!XKSXIy>.ib).VQ~W=
C~PYu`2');
define('SECURE_AUTH_SALT', '@xqXjA{+rpxUhD9}d RYe;4-L${Jaq-fFPgaKgx!Y-?_RB=BtSb!@7_Q*d7X=K|c');
define('LOGGED_IN_SALT', 'chYB7NysY]1:XDQ{c-/k:h0!<CzW#D`K=}!.0[U+bu
Bv[{w|dT3_P]n,42z3RYg');
define('NONCE_SALT', '|X=)Rm:6&1Yq`sr7XeVOW)p#i8?]y--;@)W-+_qH:a2)[J*f7)U+sfMD++JyPi*V');
NOTE: It is important that you request unique values each time.
Do NOT copy the values shown below!
These
are configuration lines that we can paste directly in our
configuration file to set secure keys. Copy the output you received
now.
Now,
open the WordPress configuration file:
server@ubuntu:/home/abhi$ nano /var/www/html/wp-config.php
Find
the section that contains the dummy values for those settings. Delete
those lines and paste in the values you copied just now.
Next,
we need to modify some of the database connection settings at the
beginning of the file. You need to adjust the database name, the
database user, and the associated password that we configured within
MySQL.
The
other change we need to make is to set the method that WordPress
should use to write to the filesystem. Since we've given the web
server permission to write where it needs to, we can explicitly set
the filesystem method to "direct". Failure to set this with
our current settings would result in WordPress prompting for FTP
credentials when we perform some actions.
server@ubuntu:/home/abhi$
/var/www/html/wp-config.php
. . .
define('DB_NAME', 'wordpressdatabase'); (Use your database name)
/** MySQL database username */
define('DB_USER', 'wordpressuser'); (Use your wordpress username)
/** MySQL database password */
define('DB_PASSWORD', 'password'); (Use your wordpress password)
. . .
define('FS_METHOD', 'direct');
( Filesystem method as DIRECT for wordpress webserver to write directly wherever it wants)
Save
and close the file when you are finished.
Step
10: Complete the Installation Through the Web Interface
Now
that the server configuration is complete, we can complete the
installation through the web interface.
In
your web browser, navigate to your server's domain name or public IP
address:
http://192.168.43.43 (USE your own IP address here)
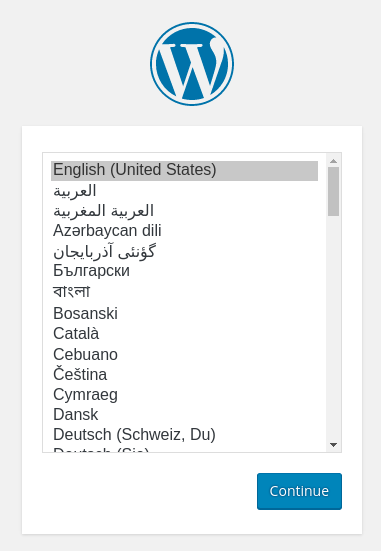
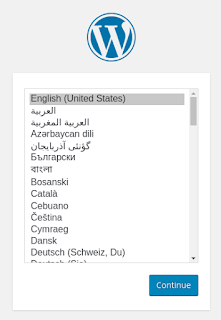
Select
the language you would like to use:
Next,
you will come to the main setup page.
Select
a name for your WordPress site and choose a username (it is recommended not to choose something like "admin" for
security purposes). Choose a strong password.
When
you click ahead, you will be taken to a page that prompts you to log
in:
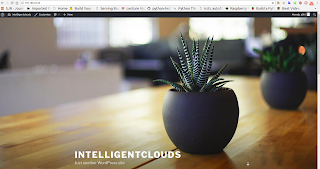
Once
you log in, you will be taken to the WordPress administration
dashboard:
Hope you have leaned lot following given steps and now hosting your wordpress based website on local serve run on Ubuntu 16.04
If you ever want to make your website global, you can do it using free "ngrok" service in Ubuntu 16.04.
Enjoy! Keep Learning :-)